
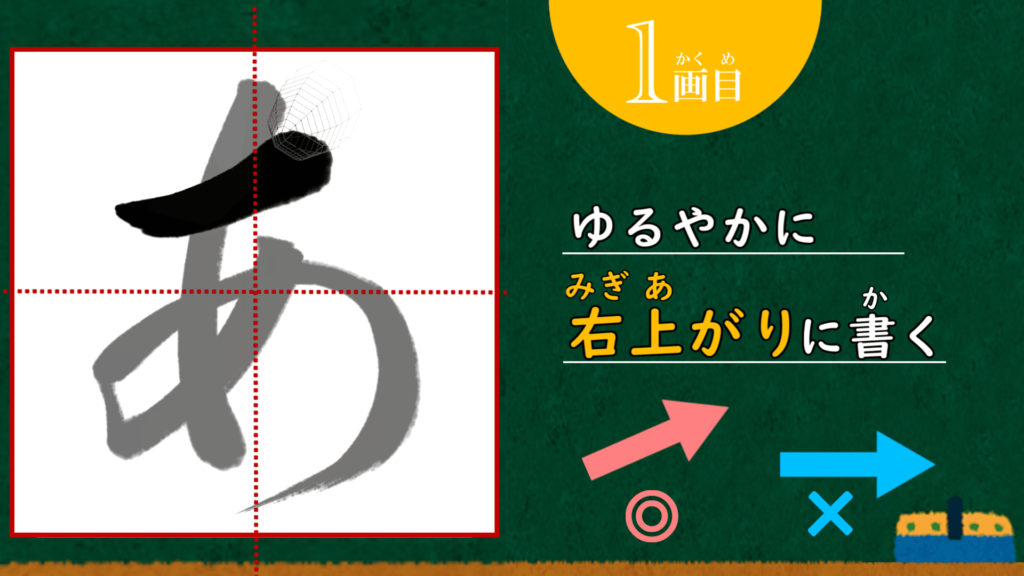
The course on how to write the "あ" in hiragana beautifully【Part 2】
Hi, I am "Teto".
This is Japanese calligraphy course that enables anyone to learn to write beautiful Japanese characters!
In this article, we continue with the explanation of "あ."
In the first part, we focused on the position of each stroke and brushwork
(if you have not yet read, please check the article below).
The course on how to write the "あ" in hiragana beautifully【Part 1】
A Japanese calligraphy course that will help anyone become proficient in Japanese hiragana! This time, I will explain how to write "あ" well! In the first part…
In the second part, I will explain how to balance and shape the overall character of "あ".
The following video is the basis for the content of the explanation.
Now, let's move on to the explanation.
Intersection of the second and third strokes
First, there are two intersections of the second and third strokes.
When these two points are equally spaced, the "あ" is beautifully aligned.
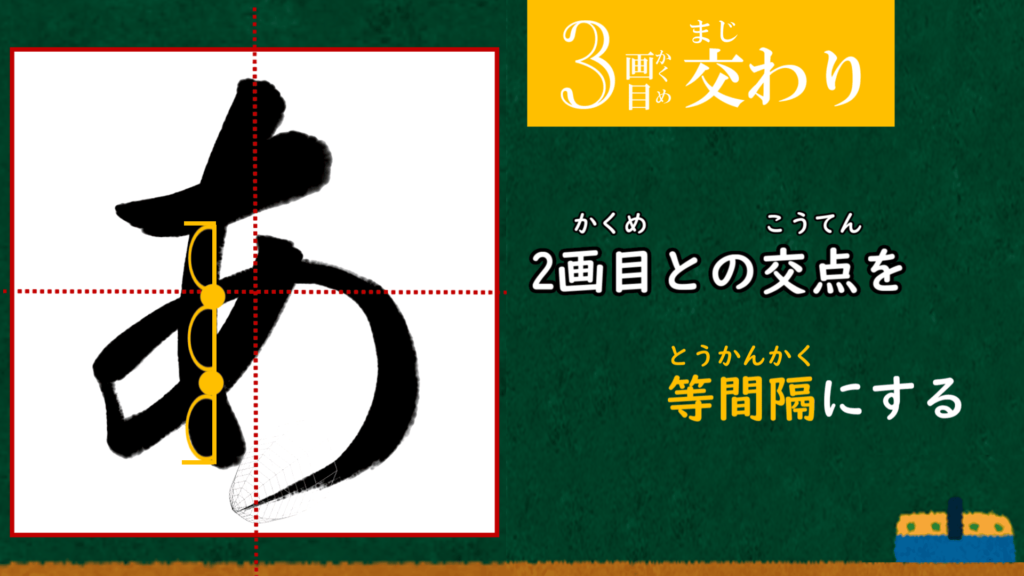
The position of the intersection of these two points will serve as a guide for the path of the third stroke.
Before writing the third stroke, you should consider where it should intersect with the second stroke.
If you set a goal from a bird's eye view before writing the third stroke, you will be able to write with confidence.
Inner space
There are three spaces inside the "あ," and it is very important to be aware of the size of these spaces!
(Perhaps this is the most important point of writing "あ"!)
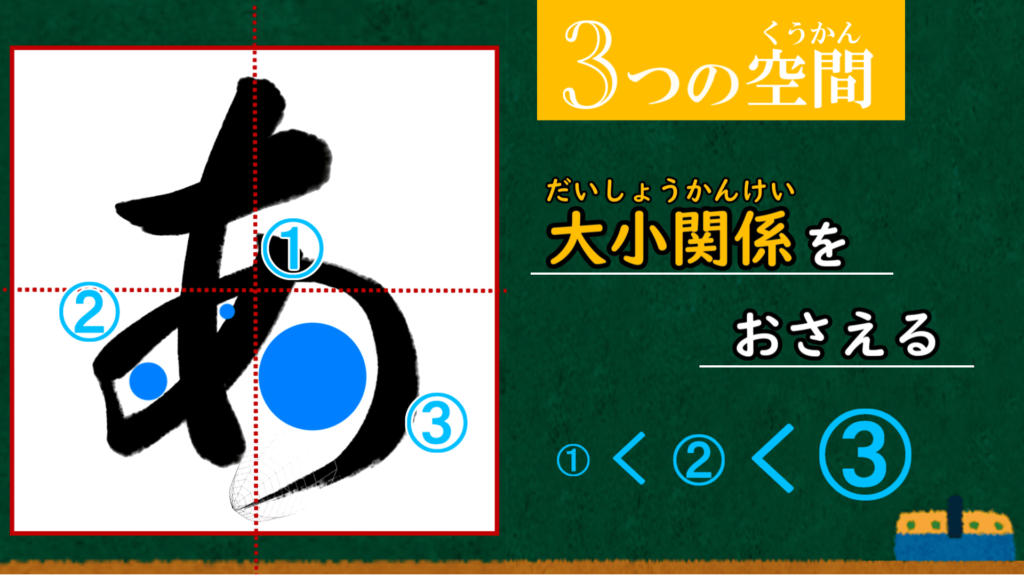
The first space ① should be narrow (but not filled in), the second space ② should be wider, and the third space ③ should be the widest.
What will happen if the space is inappropriately wide?
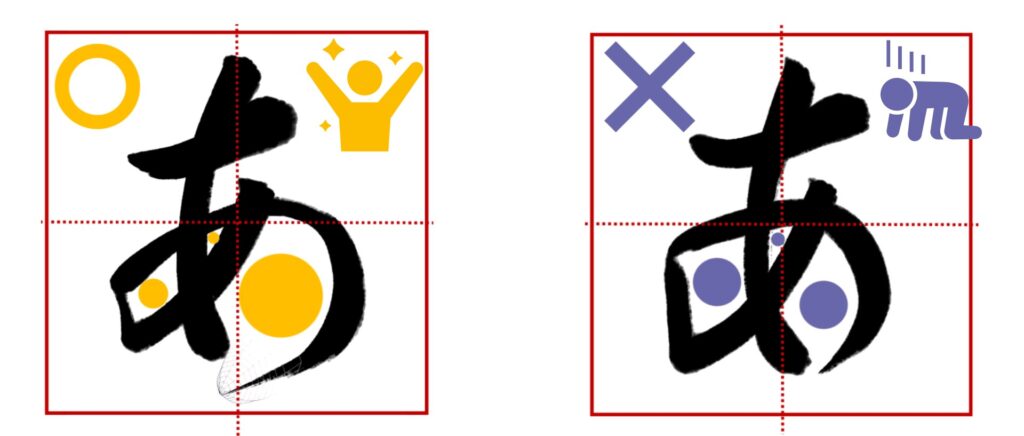
Comparing with the bad example, it is obvious, isn't it?
If the space ③ is too small, the "あ" will shrink‥.
Many people who have difficulty with "A" have a narrow space ③.
However, even if you know this, it is difficult to write with writing brush‥.
If you use a pencil or pen, you can improve the space by just being conscious of making it wider.
But when you write with the brush, don't you find that the brush doesn't follow you as you want it to?
In order to make space ③ wider, you need to be good at writing rotation (the third stroke).
The video below explains how to do this, so I recommend that you watch it!
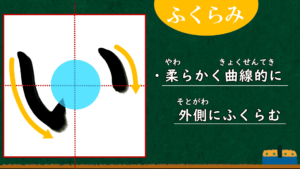
Please refer to the previous article for an explanation of what "まるめ" is!
The course on how to write the "あ" in hiragana beautifully【Part 1】
A Japanese calligraphy course that will help anyone become proficient in Japanese hiragana! This time, I will explain how to write "あ" well! In the first part…
Expansion of the third stroke
This may overlap with the above.
The third stroke should extend outward from the end of the first stroke!
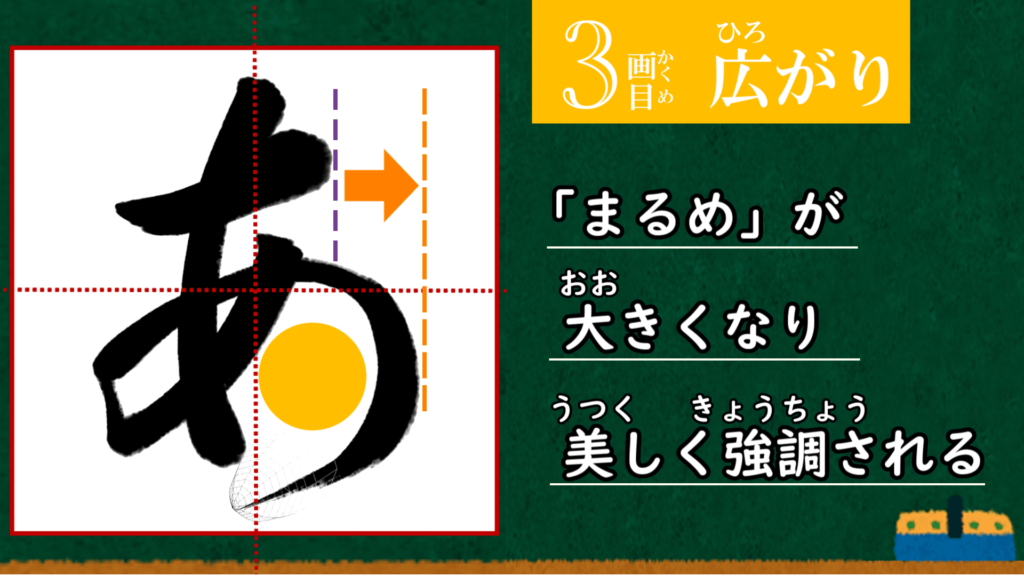
By doing so, the internal space ③ I mentioned earlier will expand and the rotation will be emphasized!
This rotation is the highlight of "A", so let's make it look beautiful!
Outline of "あ"
By the way, did you know that the letter "あ" is roughly diamond-shaped?
The outline shape differs depending on the letter, but "あ" converges to a rhombus if written properly.
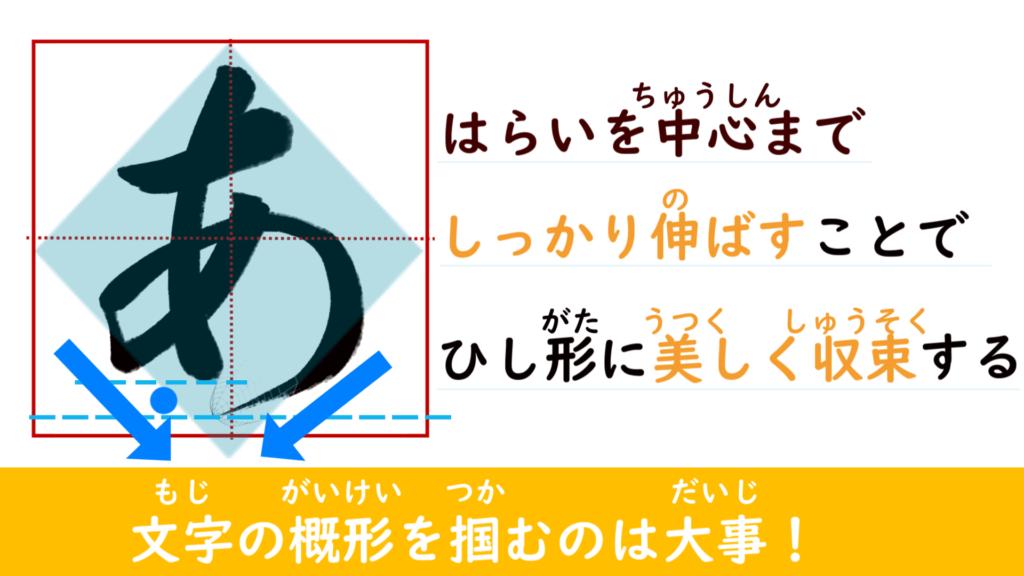
There are two key points to making the letter "あ" converge properly into a rhombus.
(1) Extend the falling stroke to near the center.
(2) Extend the falling stroke to the bottom.
(falling stroke;はらい harai)
Actually, this convergence is the key.
Let's compare this with the previous bad example.
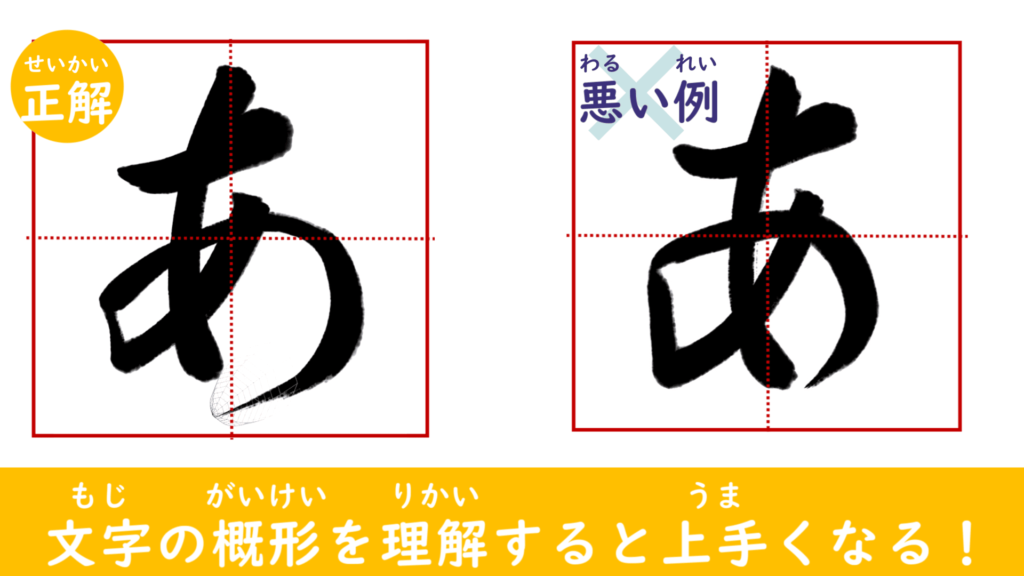
You can see the difference if you compare it with the bad example.
In the bad example, the last falling stroke is not extended enough, so the outlines do not converge well‥.
In this case, the "あ" is not coherent and does not look good.
It is important to keep your attention right up to the end of the final "あ" !
Now you have a beautiful "あ" !
The "あ" is a difficult character, so the explanation is long!
(In the video, I explain the origin of "あ" further…).
But if you understand these things, you will definitely be able to write "あ" as well as an experienced calligrapher, so please practice!
Finally, if you are interested in learning more about calligraphy after reading my explanation, I highly recommend that you visit a calligraphy class.
It’s great to come across a blog every once in a while that isn’t the same out of date rehashed material. Fantastic read.
Thank you very much for your comment.
I am honored by your compliment.